Highlights


Description
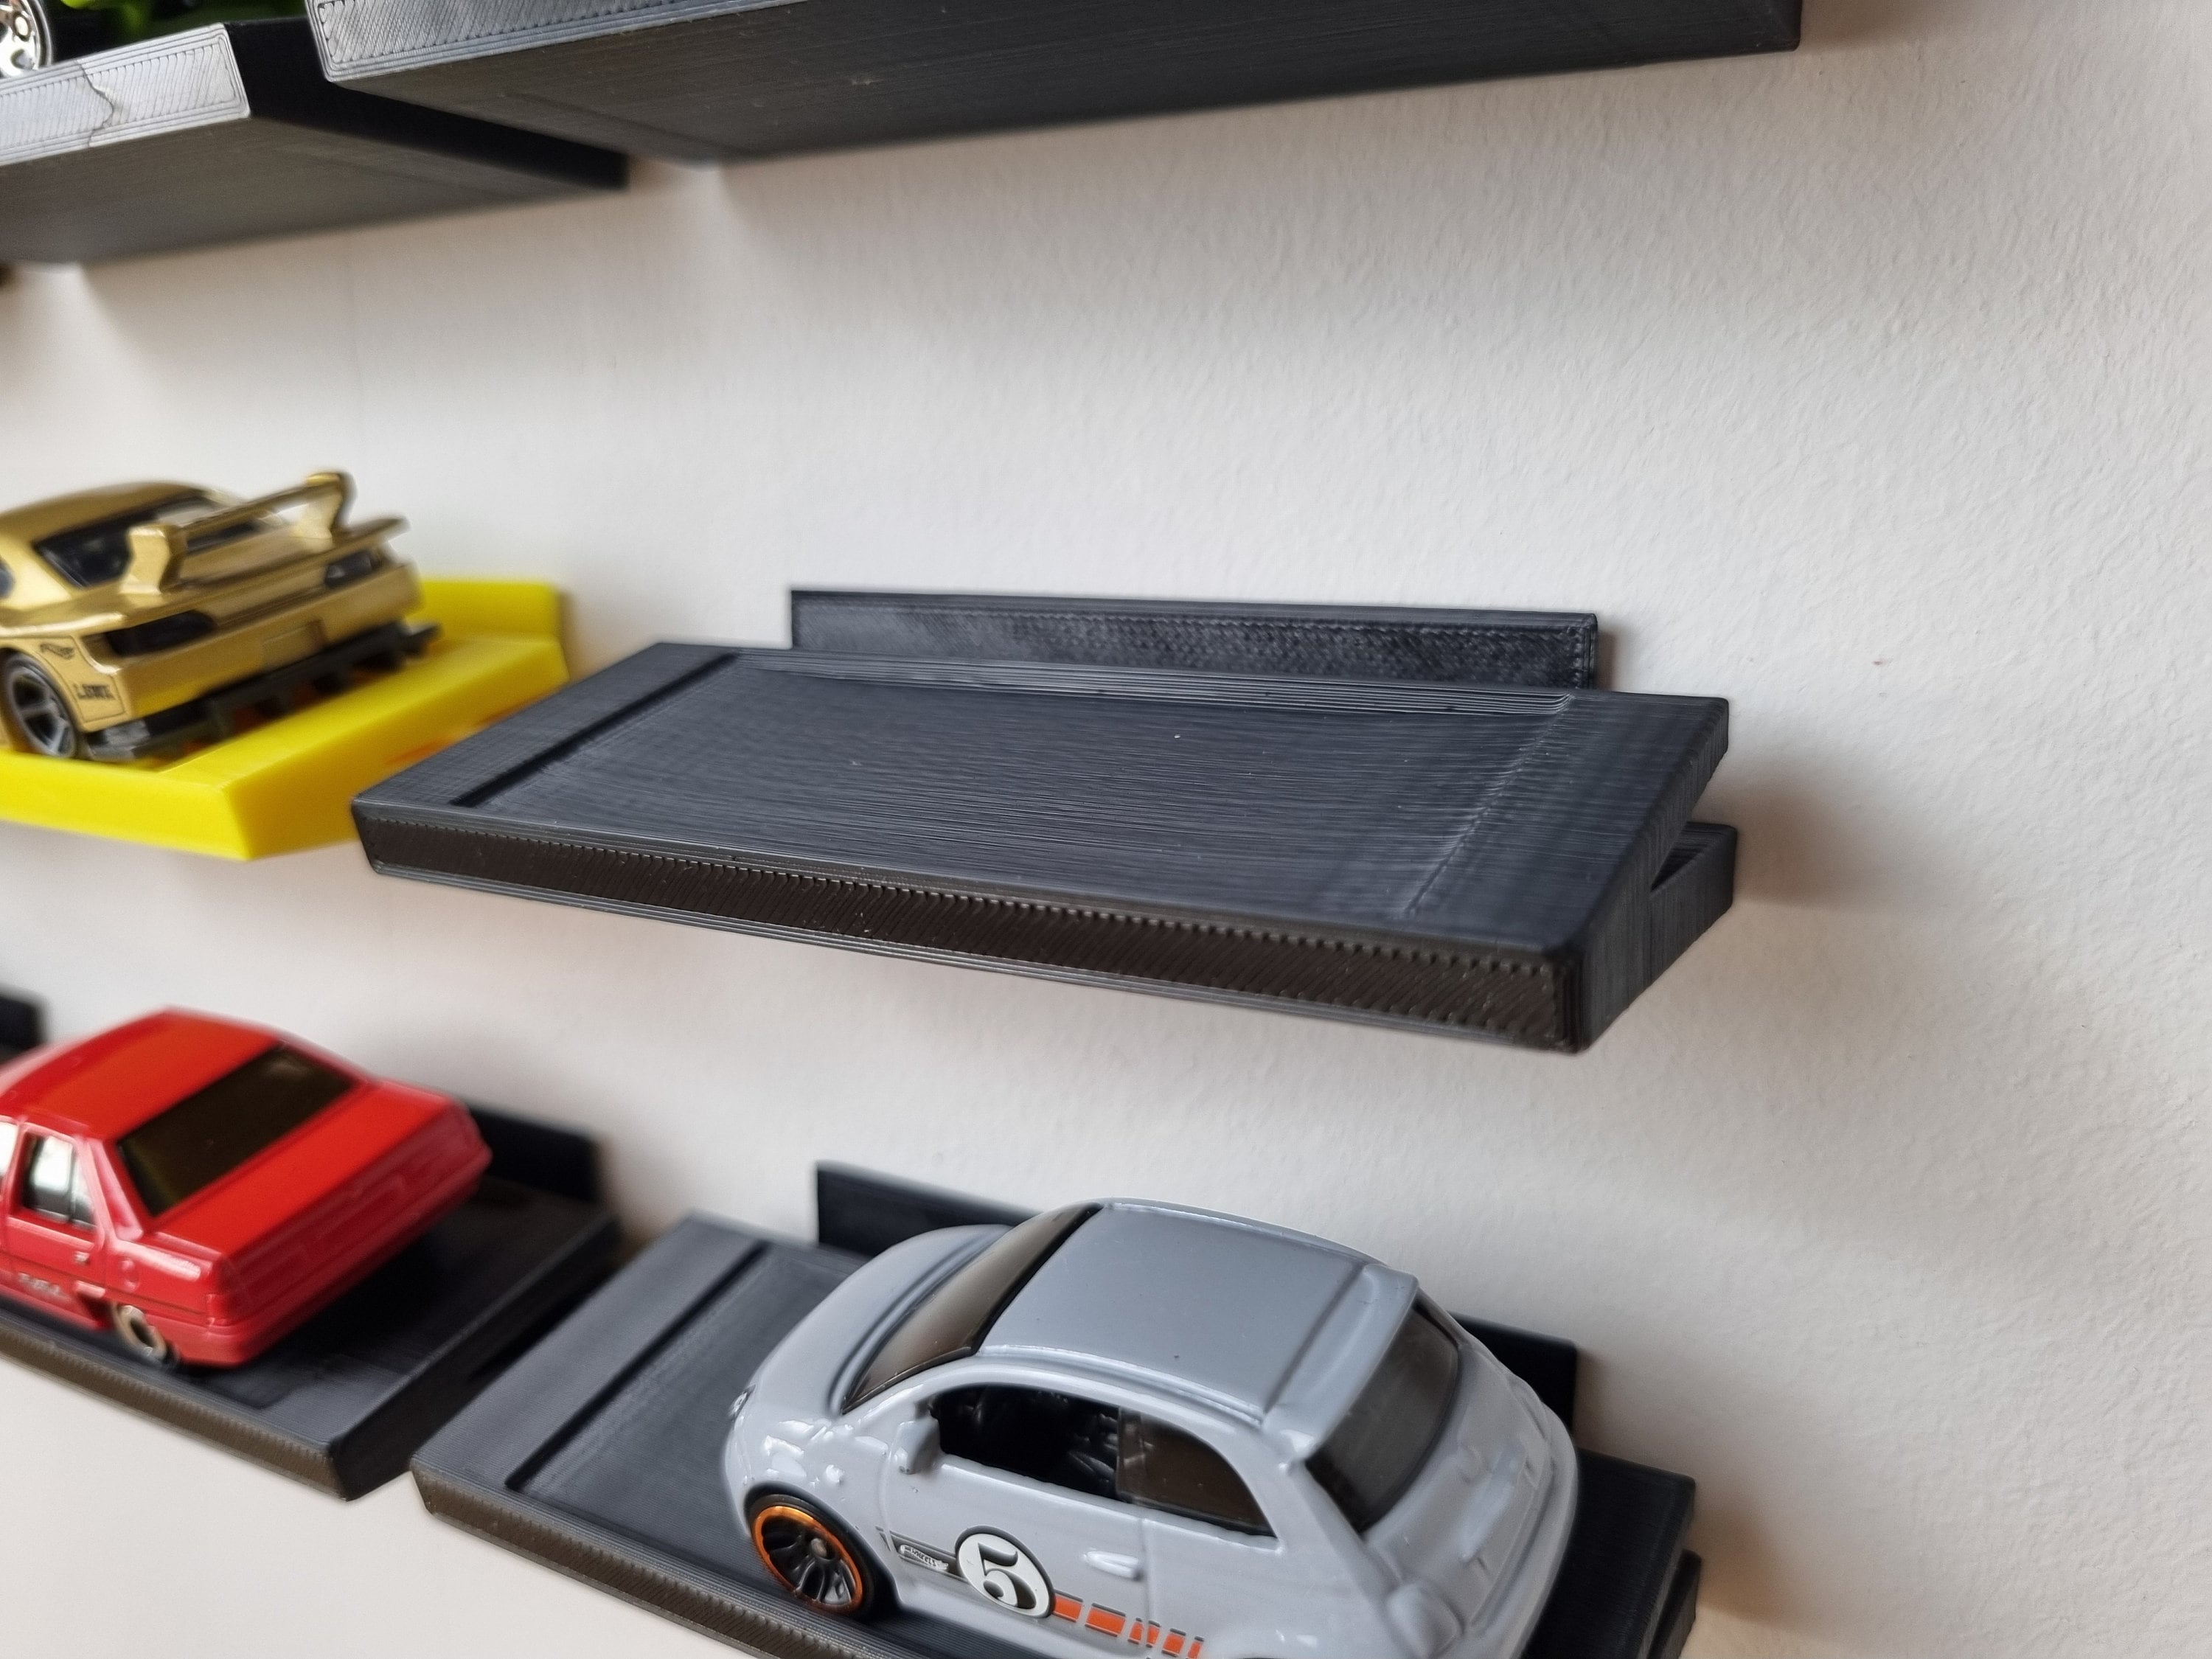
Hot Wheels display shelves are ten a penny, but they all work on the same concept: put cars in boxes and stack loads of them on the wall. This one's different, because I put some thought into it ;)
The car is held at a 15 degree angle so that you can see the side and the top. They're not enclosed, so you can space them as far apart as you need to, to get the view you want. Each shelf consists of two parts: a wall bracket, which is held up with a Command Strip and the shelf itself, which effectively hides the bracket. The shelf has a concave profile - like a (really) flattened U, so that the car sits in the middle.
Select as many as you want from the dropdown, in multiples of 1, 4, 6, 9, 16 or 25.
Why buy these ones?
* Sympathetic design - the car's the star.
* No visible screws fixings.
* UK delivery and subsidised postage overseas, so you don't pay over the odds.
* High quality.
* A whole range of colours.
(Please read below for more info, including fitting instructions.)
-------
Every order will include the right number of Command Strips to hang them.
The shelves are sized to hold a standard Hot Wheels car. The shelf is cm (inches) long and cm (inches) deep, but as long as the wheelbase isn't longer than cm (inches) then it'll fit.
A note on the colourless option: the plastic is colourless, but because 3d printing involves laying down a bead of plastic to make a layer, and then printing layers one on top of the other, it's not clear like glass. The effect is a bit like frosted glass.
A note on dispatch times: I set my dispatch times pretty accurately but if you need something by a certain date just let me know.
-------
FITTING INSTRUCTIONS
1. Clean the back of the shelf and the wall with an alcohol wipe or rubbing alcohol to ensure both are clean and of dust and finger marks.
2. Make sure the wall is painted (not wall-papered), is not flaking, and is flat (not textured like artex or woodchip). (The paint needs to be well-adhered to the wall. If paint peels away, that's a problem with the paint, not the Command Strips.)
3. Place the Command Strip on the back of the bracket, paying attention to which side is which (one side says 'wall' all over it) and ensuring it only attaches to the flat surface and the removal tab is just visible through the cutout. Press firmly against a hard surface for 10 seconds to stick the Strip to the shelf.
4. Remove the backing strip, line up where you want the shelf to be on the wall (use a spirit level to ensure it's level) and press firmly on the back surface of the bracket for 10 seconds. (Meaning in total you've pressed for 20 seconds.)
5. Leave it an hour or so before putting anything on it and check that it's stuck properly.
Please note: I'm including the Command Strips for your use, but I can't take responsibility for how you put them up. I've tested them, and I've had lots of happy customers, but if you don't put them up properly or the surface you're sticking them to isn't appropriate, they will fall down risking damage to your cars. They need to be stuck to a well-painted, smooth (non-textured, painted, not wall-papered), clean wall. If you put one up and it falls down (which really shouldn't happen if you've followed the above instructions) please don't try to re-use the Command Strip - they won't work a second time. I'd rather you got in touch and I'll send you some more.
-------
Any questions or issues please get in touch. I can do custom orders and I can offer discounts for large batches.
Thanks
Rob